Backend Software Engineer#

👋 I’m Cedric Chee. I’ve been a software engineer, AI engineer, writer, and entrepreneur.

I code and write about it sometimes. I create system softwares and apps in Go/JS.

I do product engineering and web development at startups/consulting. I enjoy backend development.

At night, I tinker with systems programming in Rust.

Read more on the about page →

Recent Posts

My notes for Google I/O 2019 Keynote Day 1

The theme for this year is “Building a more helpful Google for everyone”.

  • Google Lens
  • Duplex on the web
  • Google Assistant - 100 GB DL model to 0.5 GB
    • voice is faster than typing (tapping) your phone
  • AI and bias, fair for everyone
    • Zebra model + TCAV
  • Data Privacy & Security
    • Privacy
      • privacy controls
        • recent activities
        • auto delete control
      • 1-tap access to Google products
      • incognito mode in Maps (bringing to Chrome, YT, Search this year)
    • Security
      • Android phone as Security Key - launching today in Android 7.0+
  • Federated Learning
    • Global Model
      • E.g: Gboard
  • People with disabilities
    • Google Live Transcribe
      • Team: Dimitri Kanevsky & Chet Gnegy
    • Live Caption
      • TODO: checkout the Android sessions how they do it
    • Live Relay
    • Project Euphonia (https://g.co/euphonia)
      • Dimitri - speech stutter, ALS
      • The work of Shanqing Cai
  • Android 10.0 (Android Q)
    • What’s coming next:
      • Innovation
        • Foldables
          • Screen continuity
        • 5G
        • On-device Machine Learning
          • Live Caption
        • Dark Theme
      • Security & Privacy
        • Protections
          • Android 9.0
            • Kernel control flow integrity
            • StrongBox
            • Protected confirmation
            • DNS-over-TLS
            • MAC address randomization
            • TLSv3
          • All versions
            • Further investment in hardware based security
            • Sandbox/API hardening
            • Anti-exploitation
        • Google Play Protect
          • Gardner report - highest rating in 26 of 30 security categories
        • Almost 50 features focused on security & privacy
        • Faster security updates
          • Android OS Framework
            • Compatibility, security and privacy (OS modules) updateable directly over-the-air
            • Now this can be updated individually as soon as there are available and without a reboot of the device
      • Digital Wellbeing
        • Last year, they launched:
          • Dashboard
          • App timer
          • Flip to Shhh
          • Wind Down
        • A new mode for Android and it’s called, Focus mode
          • Coming to devices on P and Q this fall
        • Family
          • Parental Controls
    • Q Beta 3 is available on 21 devices that is 12 OEMs
  • Google continue to believe that the biggest breakthroughs are happening at the intersection of “AI + Software + Hardware”
    • Welcome to the helpful home.
    • Google Home Hub renamed to Nest Hub
      • Nest Hub Max
      • Smart home controller
      • Video calls with Google Duo
      • Kitchen TV with YouTubeTV
      • Digital photo frame
      • Indoor camera
    • Google Pixel
      • Introduce you to the newest members of the Pixel family, Google Pixel 3a and 3a XL designed to deliver premium features with high performance at the price people would love.
      • They start at just US$399, half the price of typical flagship phone.
      • Pixel 3a can take amazing photo in low light with Night Sight.
      • Portrait mode on both the front and rear cameras
      • Super Res Zoom
      • Access the Google Assistant with Active Edge
      • Call Screen using Google Speech Recognition and NLP to help you filtered out those unwanted calls.
      • Using AR on Google Maps
        • You’re going to see arrows in the real world to tell you where to turn next.
      • Battery life
        • Adaptive battery using Machine Learning to optimize based on how you use your phone.
        • You can get up to 30 hours on a single charge and 7 hours with 15 minutes of charge.
      • Strongest data protection
        • In a recent Gardner report, Pixel scored the highest for built-in security amongst smart phones.
      • Available starting today
        • You can also get it from the Google Store (https://googlestore.com)
        • In 13 markets - Australia, Germany, Italy, Spain, USA, Canada, India, Japan, Taiwan, France, Ireland, Singapore, UK.
  • Google AI
    • Jeff Dean talk about research
      • Speech recognition, RNN, BERT
      • All these ML momentum wouldn’t be possible without platform innovation.
      • TensorFlow is the software infrastructure that underlies Google’s work in ML and AI.
      • AI for Social Good
        • Research & engineering
          • Flood forecasting project
        • Building the ecosystem
          • Google AI Impact Challenge

TypeScript Type Notation

Recently, I often see developers sharing fairly complicated TypeScript code that I couldn’t wrap my mind around easily. I want to understand TypeScript better. So, this post will take a fairly complicated TypeScript example and try to break it down.

interface Array<T> {
  concat(...items: Array<T[] | T>): T[];
  reduce<H>(
    callback: (state: H, element: H, index: number, array: T[]) => H,
    firstState?: H): H;
  ···
}

This is an interface for an Array whose elements are of type T that we have to fill in whenever we use this interface:

  • method .concat() has zero or more parameters (defined via the rest operator ...). Each of those parameters has the type T[]|T. That is, it is either an Array of T values or a single T value.
  • method .reduce() introduces its own type variable, U. U expresses the fact that the following entities all have the same type (which you don’t need to specify, it is inferred automatically):
    • Parameter state of callback() (which is a function)
    • Result of callback()
    • Optional parameter firstState of .reduce()
    • Result of .reduce()

callback also gets a parameter element whose type has the same type T as the Array elements, a parameter index that is a number and a parameter array with T values.

The explanations above were written after I read and “understand TypeScript’s type notation”. It’s a good post by 2ality.

I also refer to a few learning resources below to help me demystified the previous code:

2019 Web Stack

What is everyone’s go-to web stack today in 2019?


If you plan to quickly put together a simple web app or website with React.JS.

YMMV depending on what you’re doing, but the following is a good bet if you want to make the project accessible to other developer, and it doesn’t need to quickly scale.

Front-end#

Use React.JS with TypeScript.

Create React App now makes it dead easy. Just run this command:

create-react-app myapp --typescript

The general consensus is, do not use Redux until you know React well. You might not need it. If you do need it, use boilerplate/starter kit such as redux-starter-kit, offered by the core Redux team.

Back-end#

Use Node.js (if you are comfortable with JavaScript) or Rails (if you prefer Ruby or Django if you have Python skill).

If you go with Node.js:

  • Express is a good starting point if you need a simple abstraction around Node HTTP/web server
  • Sequelize for SQL ORM library
  • Async/await has made things much easier on the Node.js side though. Express doesn’t still have async support by default, but there are middlewares and native support is coming with Express v5.

Database#

  • Use relational databases (PostgreSQL) by default for all data (primary/important and secondary/meta-data)
  • If possible, avoid NoSQL database such as MongoDB. I wouldn’t want to put my important transactional data such as subscription and e-commerce sales data there.

Caching#

Redis.

Message queue#

RabbitMQ or Kafka.

Authentication and Authorization#

  • For authentication on the web, just use cookies (do not use JWT).
  • Put nginx (app proxy) in front of Node.js and your static files (React, etc) from the same domain so that you do not have to use CORS, JWT, etc. So, an easy choice is ‘mydomain.com/static’ serves your React bundle while the cookies are on ‘mydomain.com’

Tips#

Tooling tips:

  • Use Visual Studio (VS) Code if using JavaScript.
  • Use Prettier (for JavaScript, CSS, HTML, and relevant VS Code extension) and Black ( for Python) for automated code formatting.
  • Use Jest and VS Code’s Jest extension (Orta’s) for automated tests within the editor.
  • For deployment, I roll my own using Docker container. As a one-man shop, I try to minimize sysadmin/DevOps works by off-loading as much as I can to the Cloud service providers by going the managed/zero-ops direction.
  • CodeSandbox.io, REPL.it etc are amazing for testing out various stuff without downloading stuff. You can get a React/Vue/whatever environment within seconds that will give you a public url for your app.
  • json-server in NPM will get you a mock REST API with GET/POST/etc support within seconds from a JSON file.

Life Pro Tips

What did you learn the hard way?

Worse is better#

To put it a bit more optimistically—usable now is better than perfect later.

I have found that, if I disappear behind a curtain and spend a long time trying to make something really well-polished and feature rich, that just gives the user a lot of time to build up their expectations, and also to get frustrated by the delay.

By the time you ship, they will be actively looking for ways to find fault. When I YAGNI my way into a 80% or 90% solution and turn it around quickly, though, more often than not, they will initially just be impressed at how quickly I was able to help them. Requests for changes will come, but they are generally small, so it’s usually relatively easy to turn those around quickly as well.

Why business fail#

Why did your business fail and what did you learn?

  1. Family run business
  • Lesson 1 is, never use your cultural beliefs in business. Stick to contracts.
  • Lesson 2 is, don’t just trust family.
  1. I chased and successfully won a huge customer for my small and fledgling startup. I chased and successfully won a sole service contract for a key part of their business process. I allowed a credit situation with them to grow over the course of 3 months while I allowed them to have 60 day terms. And then, they went out of business and left me holding the bag with $100k in unpaid AR after I spent $90k generating that AR with them.
  • The lesson is never trust the size of a company as sufficient reasoning that they can and will pay their bills.
  1. Big-corp CEOs don’t make for good startup CEOs 99% of the time.

What are some things that only someone who has been programming 20-50 years would know?

This is a note to myself.

  1. Everything in software development has already been invented. People just keep rediscovering it and pretending they invented it. Whatever you think is so cool and new, was copied from Smalltalk, or HAKMEM, or Ivan Sutherland, or Douglas Engelbart, or early IBM, or maybe Bell Labs.

  2. Don’t trust the compiler. Don’t trust the tools. Don’t trust the documentation. Don’t trust yourself.

  3. We don’t need any more computer languages. Still, you will run right off and invent another one. Let me guess, your amazing new language uses IEEE-754 math and fixed-precision integers. Your amazing new language is broken.

  4. Maintaining code is harder than writing it. Writing lots and lots of new code can be a mark of laziness.

  5. You have been taught to program as though memory, processor time, and network bandwidth are all free and infinite. It isn’t, it isn’t, and it isn’t. Read the rest of Knuth’s paragraph about premature optimization.

  6. You’re going to forget what your code does in a few months. Make it ridiculously easy to read.

  7. Sometimes, all you need is a one-liner in sed. (KISS principle)

  8. Beware of programmers who speak in absolutes, such as My Method Is Always Better Than Yours. Programming is an art, not a religion.

  9. If you know you will do a fixed sequence of steps more than ten times, automate it.

  10. Backing it up is one thing. Restoring it is another.

  11. Just because it works on your machine does not mean there is not a bug. -Piers Sutton

  12. Wait for the point-one release of development tools before installing them. Let other people be guinea pigs.

  13. Good programmers write good code. Great programmers write no code. Zen programmers delete code.

  14. No matter how many managers are screaming at you, the first step is to reliably replicate the bug.

  15. Sooner or later, you will meet some older man who has been around for a while. At some point, this man will lecture you about the Laws of Programming. Ignore this man entirely.

Source: Quora


Related HN discussion.

Building another "Not Hot Dog App" using PyTorch: FastAI 1.0 Baseline + Demo

By Sanyam Bhutani and Cedric Chee

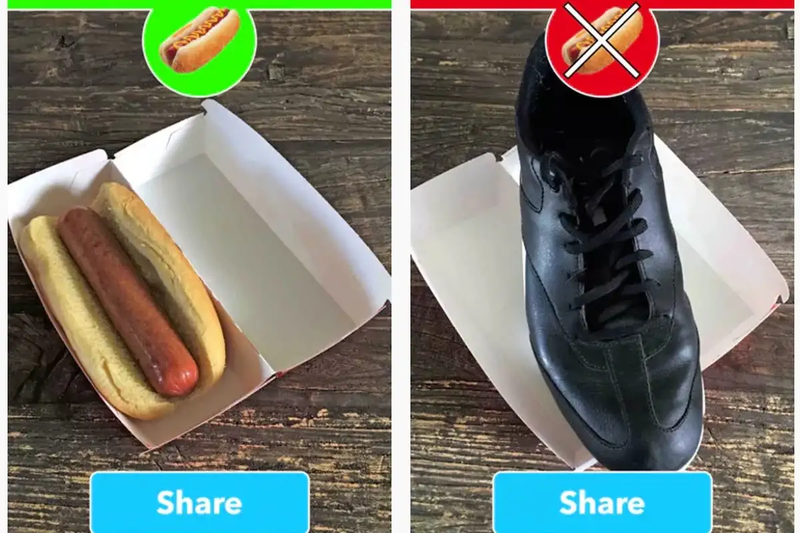
(Part 1 of the blog series to document the creation of another “Not Hot Dog” App using PyTorch.)

This post serves as an introduction to Transfer Learning as well as a few key points that I’ve learnt are good for building a baseline for a Machine Learning model. I’ll also introduce a crazy idea of building and porting an idea to an app with PyTorch as the main framework. This will be a 3 part series to document and share our success or failure of a re-build of the “Not Hot Dog App”

Not Hot Dog mobile app

This is Part 1 of the series where I’ll share how we’re (We refers to a group of students from the FastAI community) building a tiny ML app.

We’re replicating results by Tim Anglade, who had built the original app for the TV Series: Silicon Valley.

Fun fact: Tim is also a FastAI Student so we’re confident that we’d be able to achieve a good result.

Here is our three-step game plan:

  • Build a good prototype model baseline. (Prototype)
  • Port the baseline to a mobile-friendly architecture. (Production ready model)
  • Port the architecture into an app. (Put the architecture to production)

For Step 1, we’re using FastAI to build a classifier baseline.

This is the easiest part since it’s just fine-tuning the model for a quick few steps and that should provide us with a solid baseline result.

So, the first question is why are we trying to re-build an app in a framework that’s not the best choice for Mobile deployment?

We’re actually trying to use this experiment as a testing ground for an “app idea”. Now, since FastAI is my favorite framework and PyTorch follows automatically, this experiment will help us and hopefully, you, understand how hard/easy/wise/stupid it is to try and put a PyTorch model into a mobile environment.

The other reason for doing it, what better way to kill a weekend than build a HotDog or NotHotDog App?


The Baseline#

Dataset#

For our little experiment, we’ve decided to use this dataset curated by Dan Becker, hosted at kaggle.

After basic inspection, the dataset looks like a good start and has 250 images per-label, which would allow us to perform transfer learning on these images.

Transfer Learning#

The best and quickest way to achieve a baseline here is to simply use a “pre-trained” network and then “fine-tune” it to our dataset. The images are derived or similar to ImageNet so “Fine-tuning” should work well.

What is a Pre-trained Network?

Let’s for the sake of explanation consider our “Model” to be a three-year-old kid’s brain.

We have a smart and curious kid-we’re teaching him how to recognize objects in images. The kid here is the model and the task is ImageNet Challenge. The expert refers to the research groups that train the model to perform well on the Leader board.

What is Fine Tuning?

Now we have our “educated kid”, who is good at ImageNet.

Now, We give him our simple task: Name if the image is a not hot dog image.

Fine tuning: The process of taking our “smart kid” or model that performs well at ImageNet Challenge and then re-training him or giving it a quick training to a new category of images that are similar to what he is good at.

Why Fine-Tuning?

  • Faster: Its faster than training a Neural net from scratch.

    If some expert has spent their time to train the smart kid. We can just teach the smart kid a new task that he is already good at.

  • Efficient:

    As previously mentioned, the kid is smart. Smart in the sense that he is good at the ImageNet Challenge. So obviously, he would do good on similar challenges. Or at least we’d hope so.

Transfer Learning in FastAI#

This section will just be a quick walkthrough of performing Transfer Learning in FastAI for our use-case.

This is just an attempt to explain what is happening here. For a much clear explanation, please check out our Guru’s (Jeremy Howard’s) fast.ai MOOC’s V3 which comes out in 2019.

For our “baseline”, we’re testing a kid named ResNet34

What is a baseline result?

When you’re working with a ML idea, it’s easy to get lost into the complications and keep building without having a good result until a long time.

The approach suggested by Jeremy, in the fast.ai ML MOOC: build a baseline as fast as possible, and then build on top of it.

The baseline result is the fastest result of an acceptable “accuracy” for our experiment.

Accuracy here refers to how accurately the “kid” (Model) recognises the given image as not being a hot dog.

NotHotDog Baseline

  • Since the data is already separated into two folders, fast.ai supports this “ImageNet” like data and we can create our data model right away.
  • We download our kid’s brain: ResNet34-Pretrained Weights.

  • We let the model run for 38 seconds and finally we have a model with 87% accuracy.

  • Why is this important?

    In under a day-we have an idea of what should be a good or possible accuracy given our problem.

  • How good is 87%?

  • The first and third images and final images are confusing obviously, so there are some faults in the data.

  • We’ve decided that this is a good enough baseline and we can move onto step 2.

  • For the next blog, I’ll share the steps required to port this model onto a mobile.

  • Why do I think 87% is good?

    We actually have to use a “Mobile friendly” architecture so that we can run inference on the mobile phone, which means the training wheels and power of ResNet 34 won’t be there and if we’re using SqueezeNet or MobileNet-87% would be a good mark to hit.

What’s Next?#

Cedric Chee, who is another fast.ai International Fellow in our Asia virtual study group and fellow student in the fast.ai community has developed the major portions required for Step 2 and 3 of our pipeline. Please checkout the mobile app demo:

Jupyter notebooks that will walk you through every step:

cedrickchee/data-science-notebooks

We’d want to use SqueezeNet/MobileNet-whatever works better eventually and make it run on the mobile.

PS: Tim Anglade, please wish us luck. We’ll bring your Emmy home this time 😎

Originally published at Medium

Sharing My fast.ai Course Notes

Hey folks. I hope your day is going well.

Today, I am excited to share my fast.ai “Cutting Edge Deep Learning for Coders” complete course notes. This is my personal notes on the 2018 edition of fast.ai Deep Learning Part 2. The notes are mainly written text transcript of each video lesson and they are partially time-coded. Thanks to our fellow student, Hiromi Suenaga for manually (old-fashioned) transcribe the full set of videos.

Benefits of this:

  • We can refer back to the transcripts without having to play the videos all the time.
  • This will save us a ton of time and helping us learn more effectively.
    • The transcript files are extremely helpful for searching up contents quickly.
  • For whom English is not their first language that a major impediment to understanding the content is the lack of written transcript or course notes.

If you are looking for the 2017 edition (Keras+TensorFlow version), the course notes are available as well here.

Wait, there’s even more in my knowledge base (wiki). But, currently, it’s mostly for fast.ai course notes.

These notes will continue to be updated and improved as I continue to study and review the course.

Till next time, happy learning!

All rights belong to their respective owners.

About fastai_v1

Summary: fastai v1 — the rewrite of the fast.ai deep learning library.

fastai_v1 is the codename for fastai deep learning library version 1.0. It’s the beginning of the new version of the library.

From the fast.ai forums:

We’re doing a rewrite of the fastai library, with the following goals:

  • Support consistent API for classification, regression, localization, and generation, across all of: vision, NLP, tabular data, time series, and collaborative filtering
  • Clear and complete documentation for both new and experienced users
  • Well tested (both unit and integration tests)
  • Better structured code
  • Notebooks showing how and why the library is built as it is.

fast.ai has decided to create a new version of the library for the next course on October 2018. The current fastai v0.x will be maintained with the necessary fixes but fast.ai won’t make any major change.

fast.ai do plan to have a library used outside of the course. With the changes in PyTorch on one hand, and the new features added as time goes, Jeremy felt he had to start again from scratch to create something more intuitive that ties all the existing APIs together.

Current Status#

At the moment (July 19, 2018), they’ve only just started. At this stage (Aug 4, 2018), nothing is functional. If you’re interested in contributing, join the discussion at fast.ai dev forum. The development is happening in this GitHub repo.

UPDATE (2018-08-12): They’re in the process of incorporating all of the best practices used in the DAWNBench and “train ImageNet in 18 minutes” project directly into the fastai library, including automating the selection of hyper-parameters for fast and accurate training.

Why Follow Along?#

It’s early days, so I see them refactor the code every day. It would be nice to see the whole process, like for example, how and why certain decisions were made during development. I think we can learn a lot from that.

You can follow the dev commits in GitHub and see what’s happening, and fast.ai welcome you to ask questions in fastai-dev forum or make suggestions.

It’s cool to see something being written from the ground up.

How to get notifications of 'end of training' on your mobile phone

I often train machine learning/deep learning models and it takes a very long time to finish. Even an epoch in a moderately complex model takes near to half an hour to train. So, I constantly need to check (baby sit) the training process.

To help reduce the pain, I need a way to notify me on the training metrics. The idea is, we will send the training metrics (messages) as notifications on mobile using PyTorch Callbacks.

I have written some Python code snippets that helps me send my training metrics log as mobile push notifications using Pushover service. They have a limit of 7500 requests per month per user—which is fine for my usecase.

Those who’d like to have something like this, you can grab those little hacky scripts.

Cool, now, I can make tea while training without being anxious :smile:

fastai_example.py:

from notification_callback import NotificationCallback

# An example of integrating PyTorch callback with fastai model training loop
learn = ConvLearner.from_model_data(md, data)
notif_cb = NotificationCallback()
learn.fit(lr, 1, wds=wd, cycle_len=2, use_clr=(10, 20), callbacks=[notif_cb])

notification_callback.py:

from send_notification import send_notification

class NotificationCallback(Callback):
    """
        PyTorch callback for model training
    """
    def on_train_begin(self):
        self.epoch = 0

    def on_epoch_end(self, metrics):
        val_loss, accuracy = metrics[0], metrics[1]
        message = "epoch: " + str(self.epoch) + " val loss: " + str(val_loss[0])[0:7] + " val acc: " + str(accuracy)[0:7]
        send_notification(message)
        self.epoch += 1

send_notification.py:

def send_notification(msg):
    """
        Send message to mobile using Pushover notifications.
        Calls Pushover API to do that.
        Pushover API docs: https://pushover.net/api
    """
    import requests
    from datetime import datetime

    url = "https://api.pushover.net/1/messages.json"
    data = {
        "user"  : "<<YOUR_USER>",
        "token" : "<<YOUR_TOKEN>>",
        "sound" : "magic"
    }
    data["message"] = msg
    data['message'] = data['message'] + "\n" + str(datetime.now())

    r = requests.post(url = url, data = data)

Discriminative learning rate using LARS

Discriminative Learning Rate#

This paper, Large Batch Training of Convolutional Networks by Boris Ginsburg et. al has discriminative learning rate algorithm known as Layer-wise Adaptive Rate Scaling (LARS).

It was used to train ImageNet with very very large batch sizes by looking at the ratio between the gradient and the mean at each layer and using that to change the learning rate of each layer automatically. They found that they could use much larger batch sizes.

Code Implementation#

A training algorithm based on LARS implemented as an optimizer in PyTorch follows:

from torch.optim.optimizer import Optimizer, required


class LARS(Optimizer):
    def __init__(
        self,
        params,
        lr=required,
        momentum=0,
        dampening=0,
        weight_decay=0,
        nesterov=False,
        eta=0.001,
    ):
        if lr is not required and lr < 0.0:
            raise ValueError("Invalid learning rate: {}".format(lr))
        if momentum < 0.0:
            raise ValueError("Invalid momentum value: {}".format(momentum))
        if weight_decay < 0.0:
            raise ValueError("Invalid weight_decay value: {}".format(weight_decay))

        defaults = dict(
            lr=lr,
            momentum=momentum,
            dampening=dampening,
            weight_decay=weight_decay,
            nesterov=nesterov,
            eta=eta,
        )

        if nesterov and (momentum <= 0 or dampening != 0):
            raise ValueError("Nesterov momentum requires a momentum and zero dampening")
        super().__init__(params, defaults)

    def __setstate__(self, state):
        super().__setstate__(state)

        for group in self.param_groups:
            group.setdefault("nesterov", False)

    def step(self, closure=None):
        """
        Performs a single optimization step.

        Arguments:
            closure (callable, optional): A closure that reevaluates the model and returns the loss.
        """
        loss = None

        if closure is not None:
            loss = closure()

        for group in self.param_groups:
            weight_decay = group["weight_decay"]
            momentum = group["momentum"]
            dampening = group["dampening"]
            nesterov = group["nesterov"]
            eta = group["eta"]

            for p in group["params"]:
                if p.grad is None:
                    continue

                d_p = p.grad.data
                d_pn = d_p.norm()

                if weight_decay != 0:
                    d_p.add_(weight_decay, p.data)
                    d_pn.add_(weight_decay, p.data.norm())

                if momentum != 0:
                    param_state = self.state[p]

                    if "momentum_buffer" not in param_state:
                        buf = param_state["momentum_buffer"] = torch.zeros_like(p.data)
                        buf.mul_(momentum).add_(d_p)
                    else:
                        buf = param_state["momentum_buffer"]
                        buf.mul_(momentum).add_(1 - dampening, d_p)

                    if nesterov:
                        d_p = d_p.add(momentum, buf)
                    else:
                        d_p = buf
                rho = eta * p.data.norm() / (1e-15 + d_pn)
                p.data.add_(-group["lr"] * rho, d_p)

        return loss